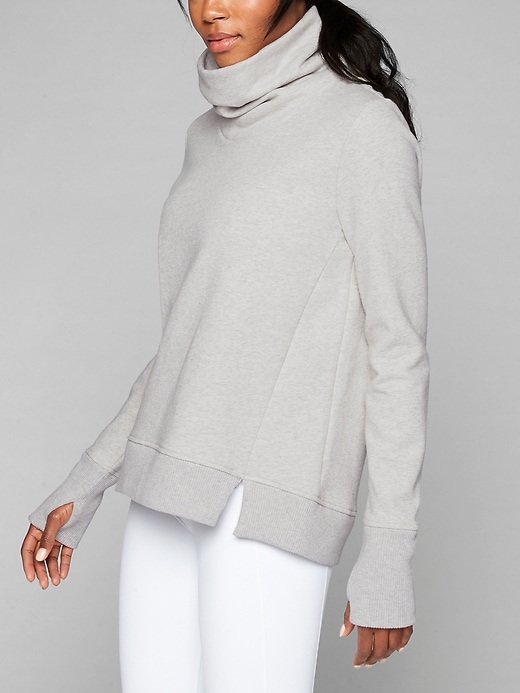
Athleta Inspired Sweatshirt
 |
| If you don't want to sew it you can still buy it here. |
I'll warn you this is going to be a picture heavy post. I'm sure there is a learning curve to sharing hacks or tutorials but I'm a visual learner so for me the more I can see the better- I figured I'd do it this way and see how it goes.
Deconstructing your sweatshirts:
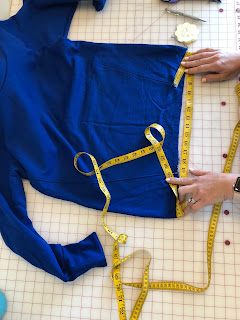
For mine, I used two 4XL which I purchased off of amazon for pretty cheap, you can check them out here- though i will warn you that the price fluctuates. It's wise to wash and dry the sweatshirt as you would the final garment, however these claim to be preshrunk. I haven't run into any issues with shrinkage but I line dry the majority of my handmade garments. When I started I measured- the width of 4XL is approximately 30". There is plenty of fabric to work with. If you aren't interested in how I deconstruction the sweatshirt you can skip ahead to the pattern hack.
First, I cut off the bottom band. I make sure to cut through existing seams since i'll be using the ribbing for my new sweatshirt. I also leave the serged seam on the ribbing rather than the body of the sweatshirt, you can see this above.
I then cut on the side of the sweatshirt to the sleeve seam which I cut at the center of the seam. This is important because we are going to utilize the sleeve and we don't want to lose any of the sleeve cap height. I also remove the bands from the cuffs.
Then you'll cut across the shoulder, going through the ribbing at the neck as this is not going to be used, if you wanted you could cut around and save it to upcyle as part as another project. At this point your sweatshirt should be open and the front and back should be seperated.

Pattern Prep:
Now its time to prep our pattern, this hack utilizes the Halifax hoodie by Hey June Handmade. I love this pattern. It has so many options, it fits me great without modifications and is a great jumping off point for many hacks! I am #teamtrace so I pulled out my tracing paper along with the pattern and traced off the pieces needed for view E.
To start we will start with the front and back pieces of the pattern. You will begin by tracing your size. If your measurements put you in between two sizes, size up especially if you are using a deconstructed sweatshirt like me. Sweatshirt fleeces has very little stretch and you don't want it to be too tight. You may notice that I never add seam allowance on the sides of these pieces I cut to make the side panel. Since I have extra room in my size I am able to do this no problem. If you've made a halifax before and find it snug in your size definitely size up.
I used a L ruler to make sure I had a 90 degree angle and that the lowest part of the back body is extended out to make your new edge (see above). Also don't be alarmed by the rotary cutter- I use that rotary cutter to cut paper only- I put my old fabric blades on it and its great for cutting out patterns especially since I use a thin tracing paper. I love the paper that I use and you and grab some here.
Now we move on to the front. If you have a design ruler its very helpful to use her. I added 2" to front center and down from the edge of the front bodice pieces. Then I use my curve to mimic the curve of the original pattern piece.
Once you've got your new longer piece, grab the triangle piece you cut off the back piece and tape it to the front, these pieces should match up perfectly. You will also need to tape so additional paper to add to the length of the bodice.
From the underarm point measure in 1" and make a new point. Go to the bottom and make a point 2" from the taped seam- you'll go 2" towards the side NOT center. Then take a marker and ruler and connect this two points.
This is now a cut line and you will cut out this pattern piece as its own panel. You'll want to lay it over your back piece to check the length and make sure that they match up (see below). I also use my design ruler to make a curve at the hem. This will bring the sweatshirt in on the side a bit which is a detail I like from the original inspiration sweatshirt from the top of the post. You won't need to check the front because should match up since you cut it from the already lengthened front piece.
At this point, you're pieces should look like the picture below. We are FINALLY ready to get cutting into our fabric. If you have yardage, you can disregard most of this and move on to construction.
The only way this work if you cut the back piece from the back of the sweatshirt and the front of from the sweatshirt. If you don't do this it won't work length wise from the neck to the hem. Also, if you are particularly tall and lengthen the Halifax already an up cycled sweatshirt might not work from you. This does work for me and for reference I'm 5'5" - this sweatshirt will cover my bum when I wear it with leggings.
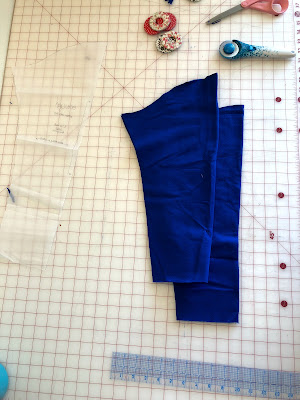
We'll move on to the cuffs, which I doubled in length to mimic the long cuff on the inspiration version. If you want you can construct the cuff from one of the bottom bands or sweatshirt fleece. If you choose the sweatshirt fleece try it on your wrist to make sure its a good fit- remember the sweatshirt fleece doesn't have much stretch! After this you will use the existing sleeves to cut your new sleeves. You will notice that the length is too short for the pattern piece. Don't be alarmed- your long cuff will make up for it. In fact I fold up 2.5" of the bottom of the sleeve when cutting my sleeve. You may want to play with this a bit if you are taller or petite.
Once the sleeves are cut you'll move on to the funnel neck or cowl, whichever you prefer to call it! You will use the main fabric from the second sweatshirt. I like to take the back of my sweatshirt fold it in half lengthwise and then again width wise to make the funnel, you can take a peek at the pictures below. You are using the cowl pieces, unchanged, to make this funnel.
To sew my funnel I like to use the "ham hot" technique. I found this little video which will be helpful if you're not familiar with this method. I make all my cuffs and funnels this way. I really appreciate the reduced bulk and I find it easier to attach to the neck since its all connected.
Now we are finally ready to get to sewing this thing together. I like to begin by taking my side panels and attaching them to the front of the sweatshirt, be sure that you have the right edges lined up. Look for the curve you added to the side that will be attached to the back if you are feeling unsure.
It's personal preference but you can also top stitch the side panels once they are attached (see the picture below). I have done this on two of my athleta knock off sweatshirts, but I didn't on the first as the inspiration sweatshirt didn't have it.
At this point you're ready to sew the shoulder seams. This sweatshirt fleece is very stable so i haven't used any clear elastic, I just serged them. Now you have the choice of stitching up the sides and setting in the sleeves or you can attach the sleeve flat. If you opt to put your sleeve in flat you need to wait to attach your sleeve cuff.
I like to complete my sleeve with the cuff the set in the sleeve. Finally, you have something you can try on. But now we need to move onto the funnel and the botton split band. You can attach the funnel per the directions in the Hey June Halifax. At this point you should have something that resembles the picture below.
For the bottom band I will measure the bottom hem minus the front panel. Then you'll want to make your band about 85-90% of the length. You will cut this from the original band of the sweatshirt or if you're using yardage, use the coordinating ribbing. This will make the band pull in the hem and will make the slip hem actual split rather than laying together. Once you have that measured you'll fold it in half width wise, right sides together and then serge or sew the ends. Then turn it right side out and press. You'll repeat this process for the much shorter piece of ribbing for the front panel (again cutting only 85-90% of the length).
I hope liked this and its been helpful! If you have any questions or suggestions I'd love to hear them! If you make an athleta hack using this tutorial I'd love to see! Tag your IG posts with #athletahack so I can check it out!
- Lindsey


I would wear it in orange.
ReplyDeleteThanks for this great hack/tutorial! I just have one question about the cuffs. Did you use the fleece fabric for the cuffs or the deconstructed cuff ribbing? If you used the cuff ribbing I don't understand how you made them deeper.
ReplyDeleteYou did a great job in designing this amazing sweatshirt, and the instructions are very well-explained and elaborate too. I’ll also try to make this, though I’m not sure if it will turn out as nice as yours. If I do manage to design this sweatshirt perfectly, then I think it will look wonderful to wear with my usual workout Leggings.
ReplyDeletePrime trading company provide the most comfortable and best quality sweatshirt. PTC introduces new fashion and amazing design of sweatshirt in the market on regular basis
ReplyDeleteprime trading company the people with its outstanding stuff for more than two decades. sweatshirt
Best Quality Sweatshirts
ReplyDelete